
What You’ll Learn
- Installing the Wordfence extension and plugin on child sites
- Configuring global and per-site Wordfence settings
- Scanning child sites for security issues
- Monitoring live traffic across your network
- Install and activate the add-on on your MainWP Dashboard site.
- Install and activate Wordfence Security on your child sites.
1. Installing the Add-on
The MainWP Wordfence Extension is a WordPress plugin. Follow these steps on your MainWP Dashboard site, not on a child site:Go to WP Admin > Plugins > Add Plugin
Click Upload Plugin
Click Choose File
Select mainwp-wordfence-extension.zip and click Install Now
Click Activate Plugin after installation
Go to MainWP > Add-ons > Manage Add-ons
Locate Wordfence Integration and click Enable
mainwp-wordfence-extension directory to wp-content/plugins on the MainWP Dashboard site, then activate and enable it.
2. Installing Wordfence Security
Install and activate Wordfence Security on each child site that you want to manage through the extension.Go to WP Admin > Plugins > Add Plugin on the child site
Search for Wordfence
Locate Wordfence Security and click Install Now
Click Activate Plugin
Sync the child site with your MainWP Dashboard
Wordfence Settings
Global Settings
Go to MainWP > Add-ons > Security > Wordfence. The extension provides these network-level tabs:- Wordfence Overview
- Options
- Live Traffic
- Blocking
- Firewall
- Scan
- Diagnostics
Individual Site Settings
The extension also provides per-site Wordfence settings.Go to MainWP > Sites > Manage Sites
Select the child site and open Wordfence in the site navigation
Open the Wordfence Options tab
Enable Override general settings
Configure the Wordfence Options, Live traffic, Blocking, Firewall, Scan, or Diagnostics tabs
Click Save Settings
Wordfence Dashboard
Go to MainWP > Add-ons > Security > Wordfence and open the Wordfence Overview tab. The sites table shows child sites where Wordfence Security is installed, including plugin status, version, visibility, last scan, and update availability.- If the plugin is inactive, the Activate Plugin action appears in the site row.
- If an update is available, the Update Plugin action appears in the site row.
Available Actions
The row action menu includes Overview, Edit, Open Wordfence, and Hide Plugin or Unhide Plugin. For active installations, it also includes Scan Site, Live Traffic, Blocking, and Scan Results. Update Plugin appears when an update is available.Important Notes
If you know that you have the plugin installed on a child site, but the child site doesn’t appear in the list, try to re-sync your sites.How to Scan Child Sites With the MainWP Wordfence Extension
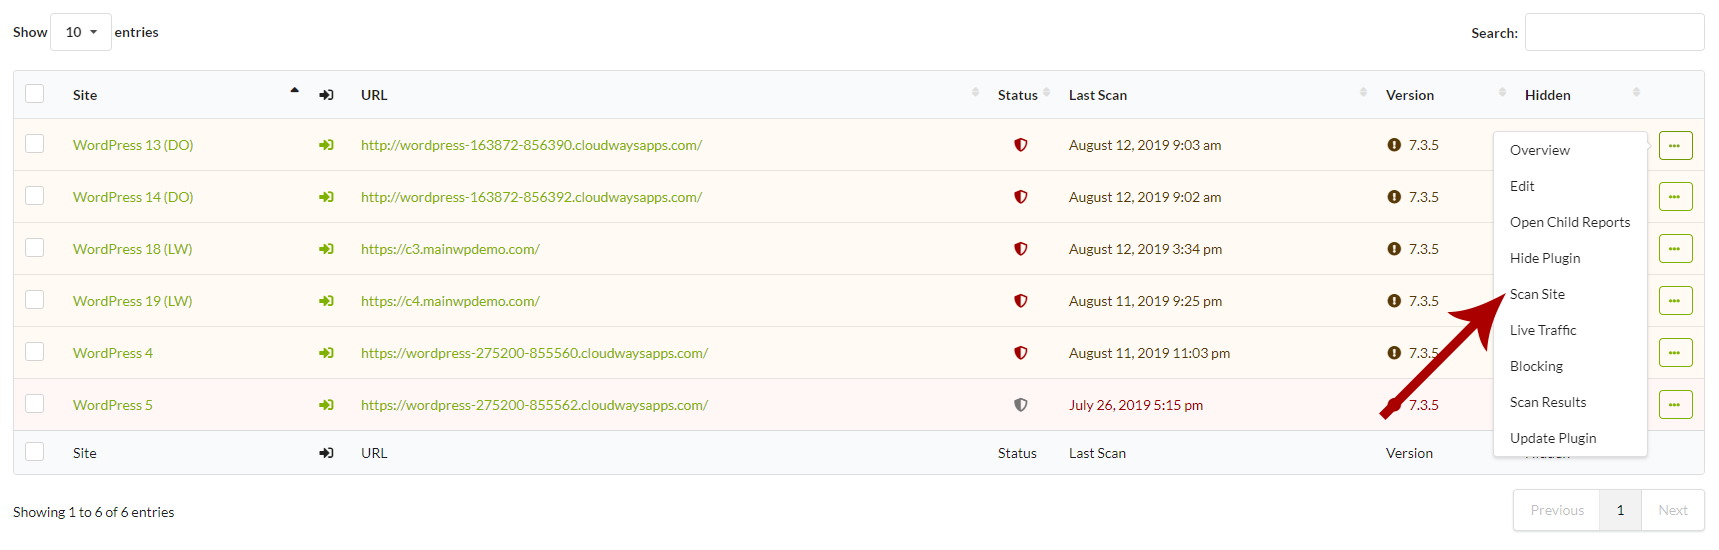
The Wordfence extension enables you to trigger the scanning process on child sites directly from your dashboard. To do this,Go to MainWP > Add-ons > Security > Wordfence
On Wordfence Overview, locate the site and click Scan Site in its row action menu
Monitor Child Sites Live Traffic
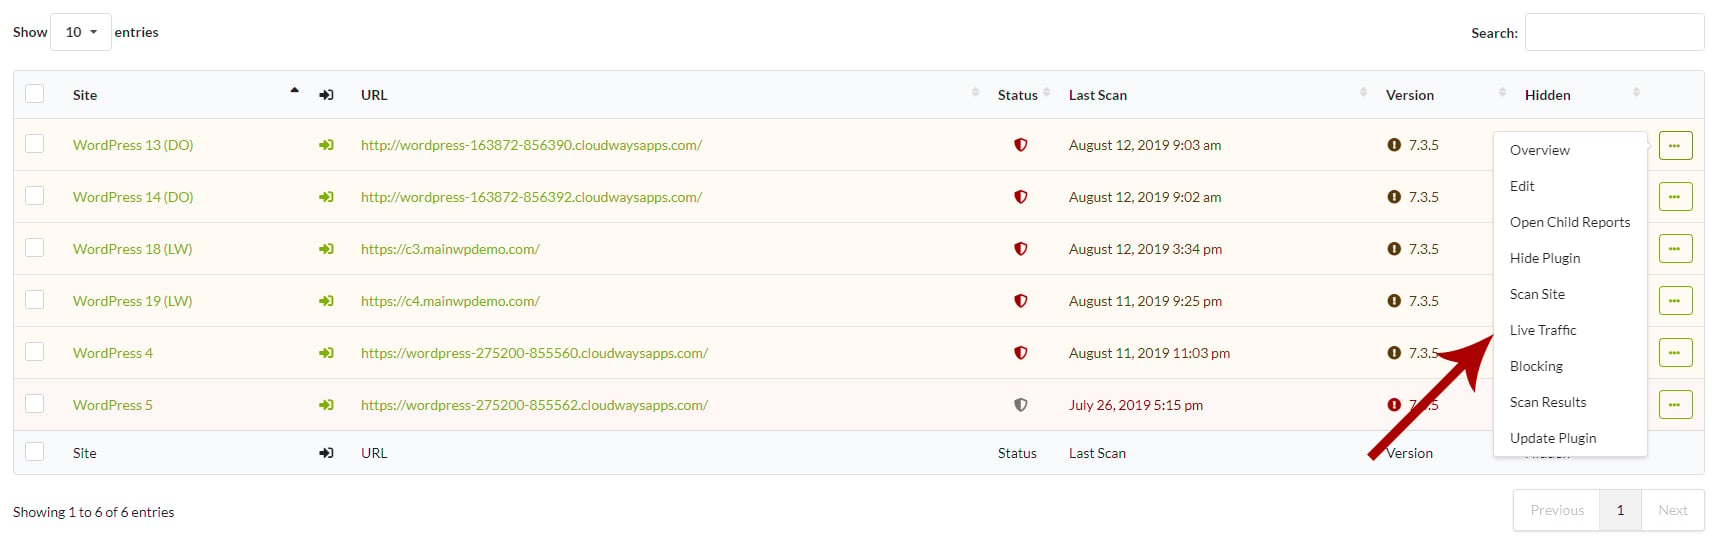
To monitor live traffic for one child site from your MainWP Dashboard:- Open the Wordfence Overview tab.
- Locate the child site and click Live Traffic in its row action menu.
- The extension opens the live traffic view for that site.
Monitor Network Live Traffic
Open the Live Traffic tab on the Wordfence page to view traffic from active child sites in one place.
Related Resources
- Security Add-ons - Browse all security tools
- Vulnerability Checker Extension - Scan for known vulnerabilities
- Sucuri Extension - Alternative security integration