
What You’ll Learn
- Why large Dashboards need entry limits
- How to set a custom limit
- Two methods to apply the setting
Prerequisites
- Choose one method below (using both is unnecessary)
When to Use This
Apply this setting if:- You manage hundreds of child sites
- The Overview page loads slowly
- The Non-MainWP widget has thousands of entries
Method 1: Custom Dashboard Extension (Recommended)
1
Install Custom Dashboard
Install the Custom Dashboard extension.
2
Open the extension
Navigate to MainWP > Add-ons > Custom Dashboard.
3
Add the PHP code
Go to the PHP tab and add this code: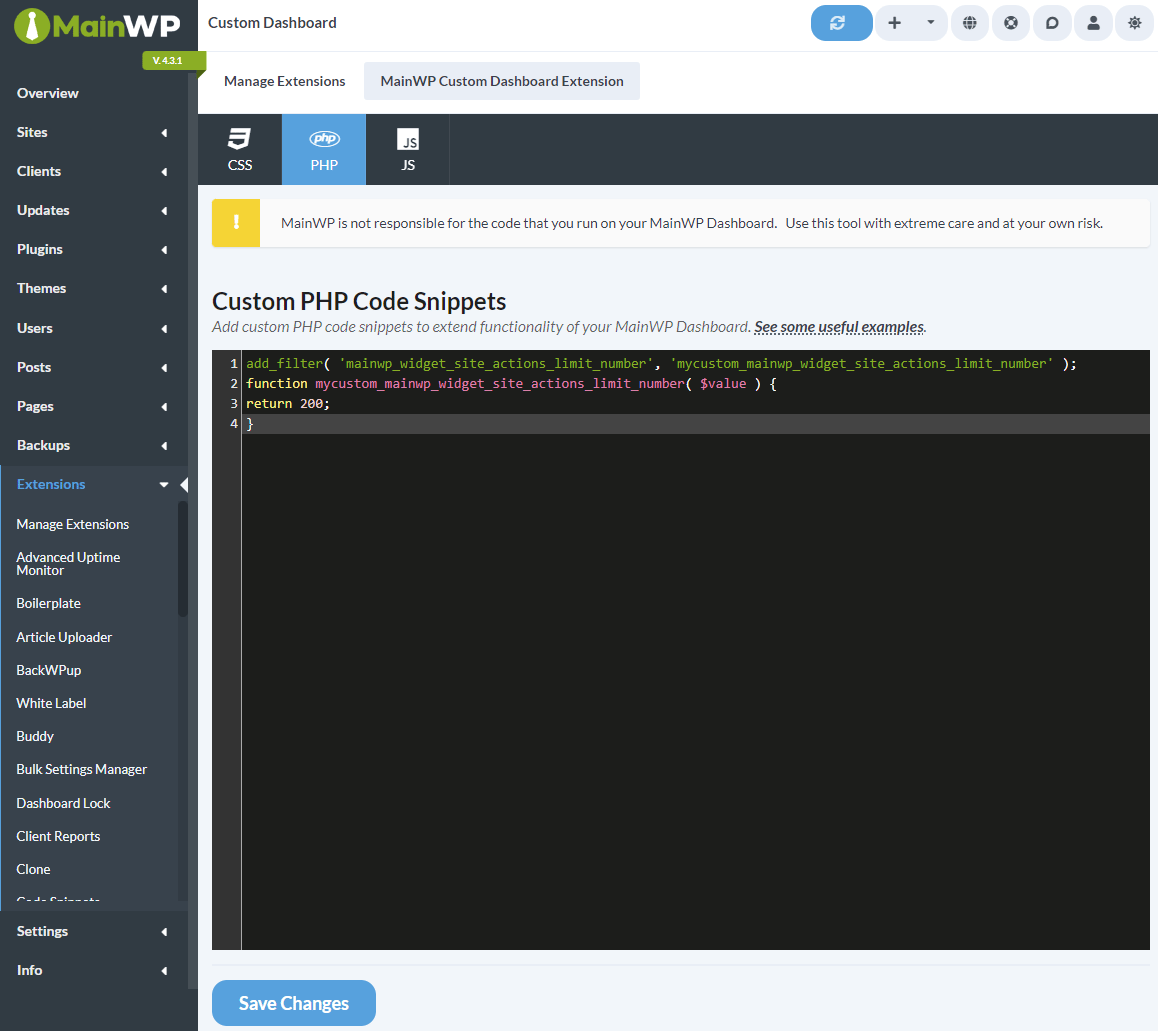
4
Adjust the limit
Change
200 to your preferred maximum number of entries.5
Save changes
Click Save Changes. The widget now displays only the specified number of entries.
Method 2: Edit functions.php
Use this method if you prefer not to install an extension.1
Open Theme File Editor
Navigate to WP Admin > Tools > Theme File Editor on your Dashboard site.
2
Select functions.php
In the right sidebar, click on Theme Functions (functions.php).
3
Add the code
Add this code at the end of the file:
4
Save the file
Click Update File.
Recommended Limits
Adjust based on your server performance and how much history you need to view.
Self-Check Checklist
- Code added via Custom Dashboard OR functions.php
- Limit value set appropriately for your Dashboard size
- Changes saved
- Overview page loads faster
Related Resources
- Optimize Dashboard for Shared Hosting - Performance tips
- Hide Widgets - Remove unused widgets
- Custom Dashboard Extension - Extension documentation