
What You’ll Learn
- Check for MySQL configuration issues
- Repair the database using WordPress built-in tools
- Repair the database using phpMyAdmin
- Restore from backup as a last resort
Prerequisites
- FTP or file manager access to your Dashboard site
- Ability to edit wp-config.php
- cPanel or phpMyAdmin access (for database repair method)
- Recent backup (optional, for restore method)
Check MySQL Configuration
Before repairing the database, verify that the ANSI_QUOTES MySQL mode is not causing the issue.1
Check MySQL modes
Go to MainWP > Info > Server Information and locate the MySQL Modes row.
2
Verify ANSI_QUOTES is disabled
Confirm that ANSI_QUOTES is not listed in the MySQL modes. If it is enabled, contact your hosting provider to disable it.
Repair Database Using WP_ALLOW_REPAIR
WordPress includes a built-in database repair feature that requires minimal technical knowledge.1
Download wp-config.php
Connect to your Dashboard site via FTP and download
wp-config.php from the WordPress root folder.2
Add the repair constant
Open wp-config.php in a text editor and add this line before the 
if ( !defined('ABSPATH') ) line:3
Upload the file
Save the file and upload it back to your server, overwriting the existing copy.
4
Access the repair page
In your browser, go to:Replace 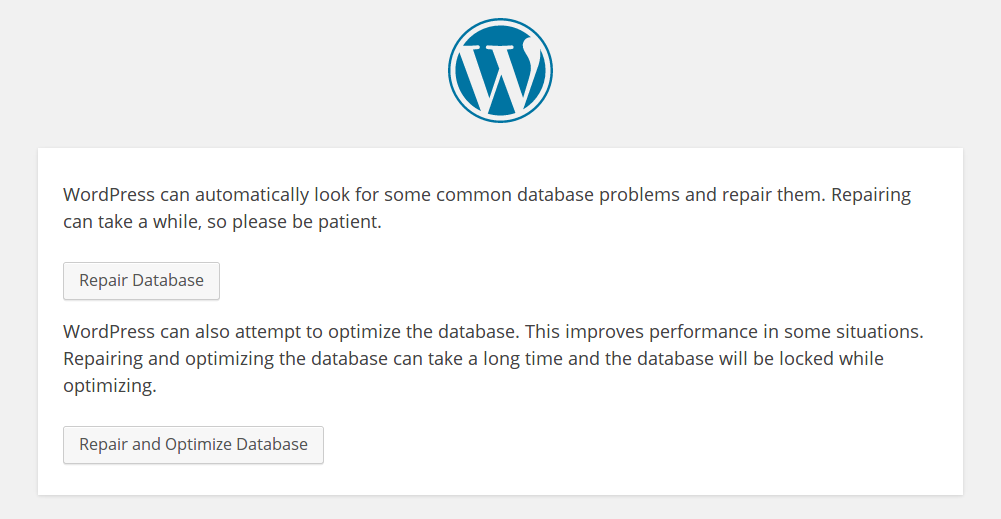
yourdashboard.com with your actual Dashboard URL.5
Run the repair
Click Repair and Optimize Database. This option repairs corrupted tables and optimizes performance.
6
Verify completion
Scroll to the bottom of the results page. You should see the message: “Repairs complete. Please remove the following line from wp-config.php to prevent this page from being used by unauthorized users.”
7
Remove the repair constant
Edit wp-config.php again and remove the
WP_ALLOW_REPAIR line you added. Upload the file to your server.8
Verify sites restored
Go to MainWP > Sites > Manage Sites and confirm your child sites are visible again.
Repair Database Using phpMyAdmin
If the WordPress repair method doesn’t work, try repairing directly through phpMyAdmin.1
Open phpMyAdmin
Log in to your hosting cPanel and open the phpMyAdmin module.
2
Select your database
In the left sidebar, click your WordPress database name. If you’re unsure which database to select, check the
DB_NAME value in your wp-config.php file.3
Select tables to repair
If you know which table is corrupted, select only that table. Otherwise, click Check all to select all tables.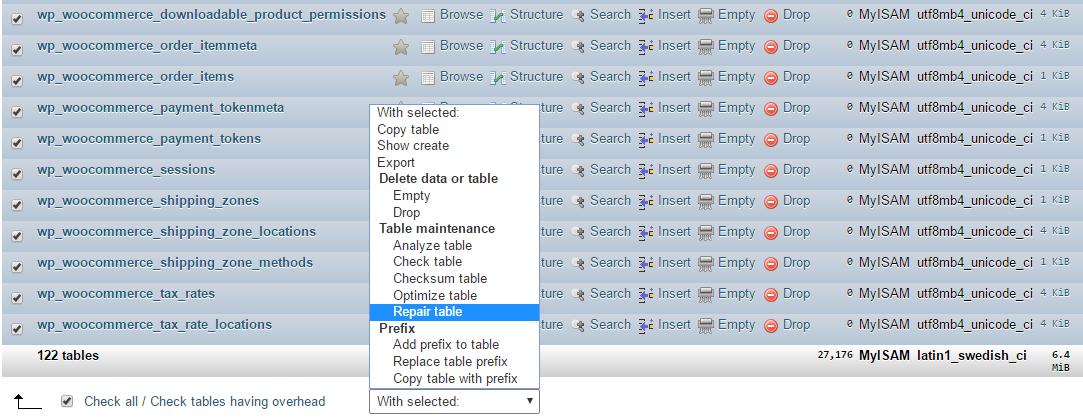
4
Run repair
From the dropdown menu at the bottom, select Repair table and click Go.
5
Verify completion
phpMyAdmin displays the repair results. Once complete, go to your Dashboard and verify your sites are restored.
Restore from Backup
If database repair doesn’t resolve the issue, restore your Dashboard database from a recent backup.1
Access your backup
Locate your most recent Dashboard database backup. This may be in your hosting account, a backup plugin, or an offsite backup service.
2
Restore the database
Use phpMyAdmin, your hosting control panel, or your backup plugin to restore the database.
3
Verify restoration
After restoring, log in to your Dashboard and verify your child sites are visible.
Restoring a backup may result in some data loss if changes were made after the backup date. Re-sync all sites after restoration to ensure current data.
If Nothing Works
If you’ve tried all methods and your sites are still missing, contact MainWP Support for assistance.Self-Check Checklist
- Verified ANSI_QUOTES MySQL mode is disabled
- Attempted WordPress built-in repair
- Attempted phpMyAdmin repair (if needed)
- Restored from backup (if needed)
- Removed WP_ALLOW_REPAIR from wp-config.php
- Child sites visible in Manage Sites table
Related Resources
- Troubleshoot Connection Problems - Other connection issues
- Resolve System Requirements - Server configuration issues
- Manage Backups - Backup your Dashboard site